Horse Trailer Tutorial
Please DO NOT copy this tutorial or upload to another site.
You may download it to work off line or print if you wish.
All images used for this tutorial belong to me.
For this tutorial you will need:
PSP 7 ----you can get a free trail version here.
My sel files ---- here. Unzip them to where ever you keep your sel files.
My images-----here. Unzip and open in PSP
My presets-----here. Unzip them to your presets folder.
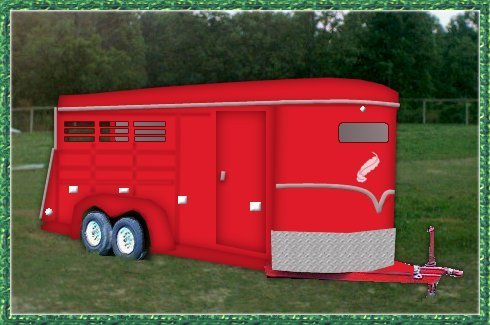
This tutorial is my actual horse trailer.
This is what we will be making. Just the trailer.
Use the background of your choice.
Open a New Image 490 X 325 with a transparent background.
Add a new layer (backwall).
Selections/Load from Disk/ 1back wall.sel
Flood fill with #B0A0A0
Change forground color to #EB2735
get the draw tool, single line width 4 and make a line down the left edge of the back wall.
Don't worry if the ends are not straight, you will only see the center section of the line

New layer (side)
Selections/Load from disk/ 2side.sel
Flood fill with #EB2735
invert selections
Drop shadow with these settings. v and h 0 Opacity 62 blur 23.5 color black.
Selections none.
New Layer (front)
Selections/Load from disk/ 3front.sel
Flood fill with #EB2735
Invert and apply the same drop shadow.
Selections none.
New layer (roof)
Selections/Load from disk/ 4top.sel
Flood fill with same red.
Invert and apply the same drop shadow.
Selections none.
New layer (wheelwell)
Selections/Load from disk/5wheel well.sel
Flood fill red.
Invert and apply drop shadow but change blur to 14.8
Selections none.
New layer (back step)
Selections/Load from disk/6back step.sel
Flood fill red.
Invert selection and apply the same drop shadow.
Selections none.
New layer (front step)
Selections/Load from disk/7front step.sel
Flood fill red
Invert selection and apply the same drop shadow.
Selections none.
New layer (front trim plate)
Change background to texture and choose panel with settings as pictured.
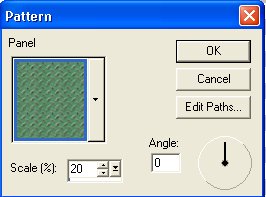
Selections/Load from disk/ 8front trim.sel
Flood fill with the pattern.
Go to Colors/colorize and set hue to 7 and saturation to 4.
Colors/adjust/brightness and contrast and adjust brightness to 63.
Selections none.
New layer (door).
Selections/Load from disk/9door.sel
Flood fill with red, invert selections and apply same drop shadow.
Selections none.
New layer (side shadows).
Selections/Load from disk/10sideshadow.sel
Invert selections and apply drop shadow H and V =0 Opacity 40 Blur 4.9 color black.
Selections none.
Click on the side layer to select it.
Selections/Load from disk/11sideventcutouts.sel
Hit the delete key once and keep selected.
Go to Effects, 3d, outerbevel and use the housetrailer bevel.
Selections none.
Click on the front layer to select it.
Selections/Load from disk/12frontwindow.sel
Hit delete one time. It was turn gray
Invert selection
Apply the drop shadow and turn the opacity back to 62 and blur to 8.6
Selections none.
Make sure you are on the top layer.
New layer (roof trim).
Selections/Load from disk/13rooftrim.sel
flood fill with #B0A0A0
Effects, inner bevel horsetrailertrim preset.
Selections none.
New layer (back trim).
Selections/Load from disk/14backtrim.sel
flood fill gray and apply the same inner bevel
New layer (front trim).
Selections/Load from disk/15front trim.sel
Flood fill gray and apply the same inner bevel.
New Layer
Selections/Load from Disk/16reflectors.sel
Flood fill white.
Apply same inner bevel.
New Layer
With your selection tool, make a small rectangle for the door handle.
Flood fill with white, apply the inner bevel and a drop shadow.
Click on the bottom layer and add a new layer (trailer hitch.
Open up the trailer hitch.psp file enclosed
Copy and paste as a new selection and put in place at the front of the trailer.
New layer (wheels).
Copy and paste wheels as a new selection and put in place.
Hide layer 1 and merge visible.
Apply the same drop shadow as before.
Add a background and YOUR DONE...
If you have any questions, please e-mail me here Feathers3
©2002 by Nancy Hollinger
Tutorial by Feathers 3
My Index Page

