Little Farmer Tutorial
Please DO NOT copy this tutorial or upload to another site.
You may download it to work off line or print if you wish.
All images used for this tutorial belong to me.
For this tutorial you will need:
PSP 7 ----you can get a free trail version here.
Eye Candy 4000----you can get a trial version here
My sel files here. Unzip them to where ever you keep your sel files.
My images here. Unzip and open in PSP
This tutorial was inspired by a recent picture I saw in one of my magazines.
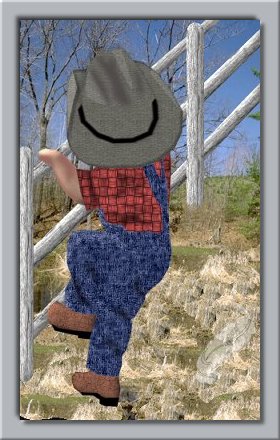
This is what we will be making. Just the boy and the fence.
Use the background of your choice.
STEP 1
File New and make a 300 x 500 transparent image.
Add a new layer named arm
Selections/Load from disk/arm.sel
Flood fill with #D7AE98 - Keep selected
Effects/Noise/Add 10% uniform
Effects/Blur/Gaussian Blue and set it to 2.00
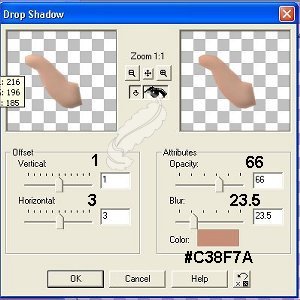
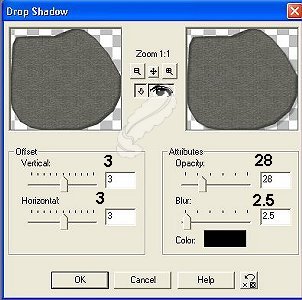
Invert selections and add this Drop Shadow
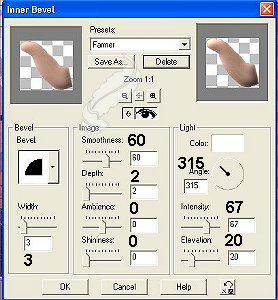
Invert selections again and apply inner bevel
You may want to save this preset as Farmer for future steps
STEP 2
Add a new Layer named arm shadow.
Selections/Load from disk/armshadow.sel
Flood Fill with #B38A83
Deselect
Effects/Blur/Gaussian Blur and set it to 3.00
Load the arm.sel on this layer,invert select and hit the delete key to clean up the edges.
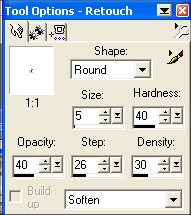
Use the Retouch tool to soften edges of the arm shadows with these settings

STEP 3
Add a new layer named shirt
Selections/Load from disk/shirt.sel
Flood fill with #B54545
Apply Eye Candy Weave and use the tight weave preset
Invert Selections
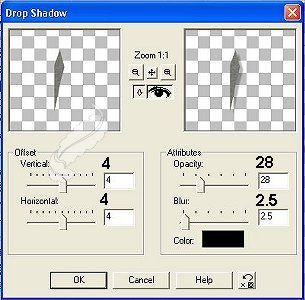
Apply the following drop shadow

STEP 4
Add a new layer named shirt shadows.
Selections/Load from disk/shirtshadows.sel
Flood Fill with Black
Deselect
Effects/Blur/Gaussian Blur set to 3.00
STEP 5
Add a new layer named shoes
Selections/Load from disk/shoes.sel
Flood Fill with #AC725C
Deselect
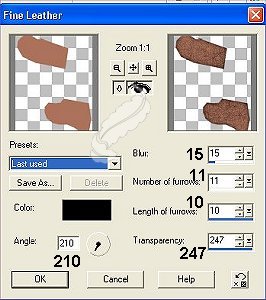
Effects/texture/fine leather with these settings
Effects/3d/inner bevel/Farmer preset
STEP 6
On same layer go to Selections/Load from disk/shoesoles.sel
Flood fill black
STEP 7
New Layer named jeans
Selections/Load from disk/jeans.sel
Flood Fill with #525F89
Eye Candy/Weave/Denim preset
STEP 8
On same layer go to Selections/Load from disk/jeansshadow.sel
Go to Colors/adjust brightness and contrast
Set Brightness to - 30 and Contrast to 0
STEP 9
New Layer named jeansshadow2
Selections/Load from disk/jeansshadow2.sel
Flood Fill with black
Selections none
Effects/Blur/gaussian blur set to 3.00
STEP 10
New layer named hat brim
Selections/Load from disk/hatbrim.sel
Flood fill with hat cloth at 40%
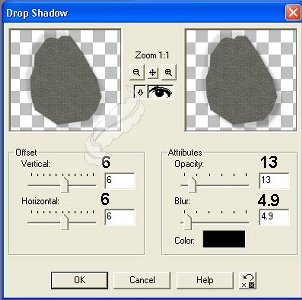
Invert selection and apply the following drop shadow
Apply again using -3
STEP 11
New Layer named turned up brim
Selections/Load from disk/turned up brim.sel
Flood fill with the hat cloth
Go to Colors/Adjust Brightness and Contrast and set Brightness at 20 and contrast at 0
Selections/None.
Go to Effects/3d/drop shadow and apply these settings
STEP 12
New Layer named hat crown
Selections/Load from disk/hatcrown.sel
Flood fill with hat cloth
Selections/none
Effects/3d/drop shadow with these settings
Close all layers except the hat brim, turned up brim and hat crown layers.
Go to Layers/Merge visible
Rename this layer hat
STEP 13
On the same layer (HAT)
Selections/Load from disk/hathighlight.sel
Colors/Adjust Brightness and Contrast and set brightness to 18 and contrast to 0
STEP 14
New layer named hat shadows
Selections/Load from disk/hatshadows.sel
Flood fill with black
Selections none.
Effects/blur/gaussian blue and set it to 3.00
Now click back on the hat layer
With the magic wand click on the outside of the image
go back to the hat shadows layer and hit delete to clean up the edges again.
STEP 15
New layer named hat band
Selections/Load from disk/hatband.sel
Flood fill with black
Selections none
With your retouch tool soften edges with these settings
STEP 16
Click on Layer 1 and add a new layer named rail1
Selections/Load from disk/rail1.sel
Flood fill with driftwood
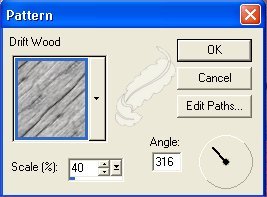
Effects/3d/inner bevel use the Farmer preset you saved earlier.
STEP 17
New layer named rails 2
Selections/load from disk/rails2.sel
Flood fill with driftwood with these settings
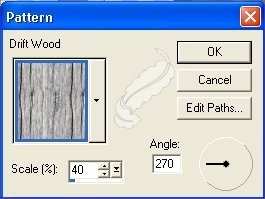
Effects/3d/inner bevel with the same settings.
If you have any questions, please e-mail me here Feathers3
©2002 by Nancy Hollinger
My tutorial index is HERE
My index page is HERE

